Subscription growth hack (by PayKickstart)
Facebook Group - 3,932 members
Visit Group
If you run a business where you need to bill your customers at regular intervals, you may need a payment solution that supports this. With a credit card or other solutions that bill one-off, you must follow up with customers every month to get payments. This can get tedious and impractical, especially if your customer base grows substantially.
Also, if you run a SaaS business, billing manually does not make sense. PayPal recurring payments are a great way to solve this challenge. Before we look at how to set up recurring payments, PayPal the right way, let’s first answer some fundamental questions about the billing method.
PayPal recurring payments allow you to bill your customers at regular intervals. For instance, if you charge a monthly subscription, you need a recurring payment solution to manage these payments. In a typical recurring payment transaction, a customer follows four basic steps:

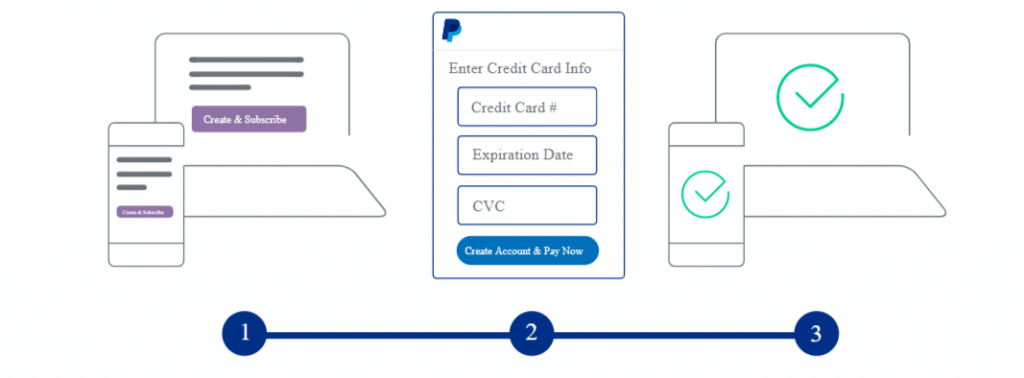
If the customer does not have a PayPal account, they will follow the following steps:

As a merchant, there are a variety of ways you can use recurring payments for your business. Here are some examples:
PayPal currently supports two types of recurring payments:
PayPal fixed recurring payments is a simple frequency-based payment model that bills customers a fixed amount at a given frequency (e.g., per month). This type of payment is great for services that offer a fixed service for a fixed price. An example is a SaaS business that offers a fixed service on a fixed charge.
Per user/seat recurring payments charge a frequency-based fee that is further influenced by a quantity variable. For example, a SaaS company that charges per user will use this type of billing to charge a variable fee among its customers.
Creating recurring payments in PayPal can be accomplished in one of three ways:
This option requires programming skills so you may need to work with a programmer. To create recurring payments:
Creating an embeddable button can be an easy way to add recurring payments to your website in the shortest time possible. The only challenge is that adding a button makes it impossible to customize the checkout process for your customers. To create a button, follow steps 1-3 above. Then:
Note: Buttons are best used for donations, which do not require a shopping cart experience.
PayKickstart allows you to add PayPal as a payment option directly to your PayKickstart account profile. To do so, follow the following steps:
Although your customers may know and trust you, not being 100% transparent during billing can lead to customer churn. For example, if a customer receives a billing statement from you that does not show all the details about the charges, they may not feel confident continuing the subscription.
To avoid this, we recommend sending out detailed invoices before you bill, and detailed statements after you bill. Also, we recommend maintaining consistent branding in all billing related communications to ensure your customers always know they are talking to you.
Some black hat e-commerce methods recommend making it difficult for your users to unsubscribe so you can extract more value from them. This is a poor approach to customer retention. In many cases, this results in negative reviews and feedback.
A better way is to offer an easy way for your customers to cancel their subscription. Why? Because it costs you more to hang on to unhappy customers than to happy ones. PayKickstart makes the cancellation process easy for your customers so they can cancel at any time.
Inevitably, your customers’ credit cards will expire. If you do not have an effective way to notify them of this issue, you may end up with lost revenue. Composing and scheduling effective dunning emails is an important step you should take to avert this.
When you use PayKickstart, you can easily create and schedule dunning emails to send out to your customers. Keep in mind that you may need to compose a series of dunning emails as sending out one may not be effective with some customers.
Setting up recurring payments in PayPal can be an effective way to help your business attract more customers. As PayPal is a well-known and trusted brand, using it on your website can also help boost your brand.
Although you can set up PayPal recurring payments manually or by adding a button, we recommend using a payments integrator like PayKickstart that does all the heavy lifting for you.
To discover how you can set up recurring payments PayPal with PayKickstart, set up a free PayKickstart account today or contact support for direct assistance.
Mark Thompson is CEO of PayKickstart and a serial entrepreneur. He is passionate about helping thousands of entrepreneurs and businesses grow through advice, automating payments and providing affiliate tools.
Read More About Mark Thompson