Subscription growth hack (by PayKickstart)
Facebook Group - 3,932 members
Visit Group
The Teachable concept is simple. Their platform enable teachers to create their own online “classrooms”, allowing them to sell their class content to the students through their own websites.
Teachable handles all of the content hosting and delivery, so you can focus on what matters: creating awesome courses!
And now… you can automatically enroll your customers into your Teachable classroom, right from your PayKickstart account!
Let Teachable handle the content hosting and delivery… and PayKickstart will handle the sales! It’s what we’re good at… hehe
Plus, by selling your Teachable course via PayKickstart, you can also benefit from 30% profit increases from order bumps, 100% increases in customer value from one-click upsells, and double conversions from customizable checkout pages. Sounds like a whole lot more money for your business, simply by selling your Teachable course through PayKickstart. 😉
Step 1: First, you need to have a Course in Teachable.
Step 2: Then, create a Campaign and add a Product in PayKickstart for that Course.
Step 3: Create a Test purchase for that Product in PayKickstart. Note: the reason you do this is because later, Zapier is going to require that there was at least one recent order.
Step 4: Now, you can integrate Zapier with PayKickstart. Note: Make sure to add the webhook from Zapier in your PayKickstart Product that you want to auto-enroll a student into when they purchase.
Step 5: Once Zapier and PayKickstart are integrated, you can create a Zap which will trigger an action if a new order is placed through PayKickstart for the specific product purchased. Basically, when a sale is made, the zap will tell Teachable to enroll the customer.
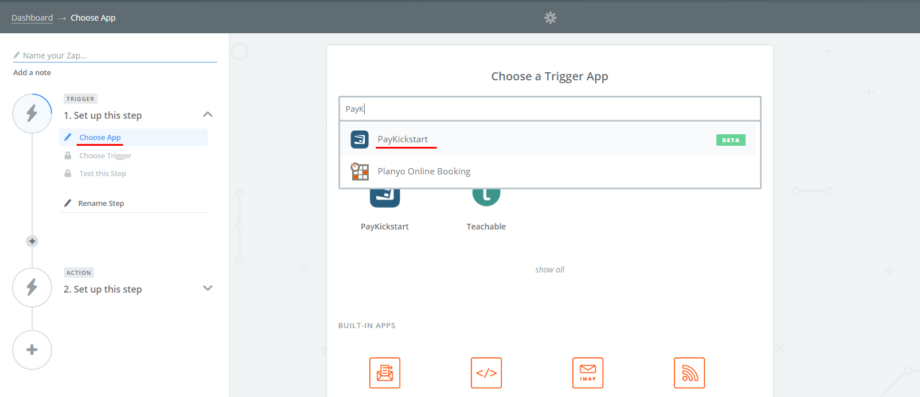
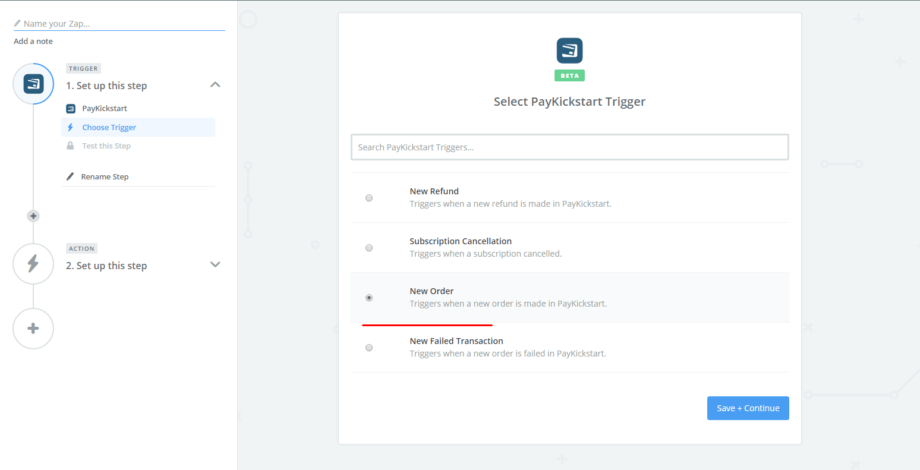
Step 6: After clicking on Save + Continue button, you’ll see a screen to test your PayKickstart Trigger by fetching an existing order. Remember we already created a Test order in Step 2 for it. Click on the Fetch & Continue button as shown below.

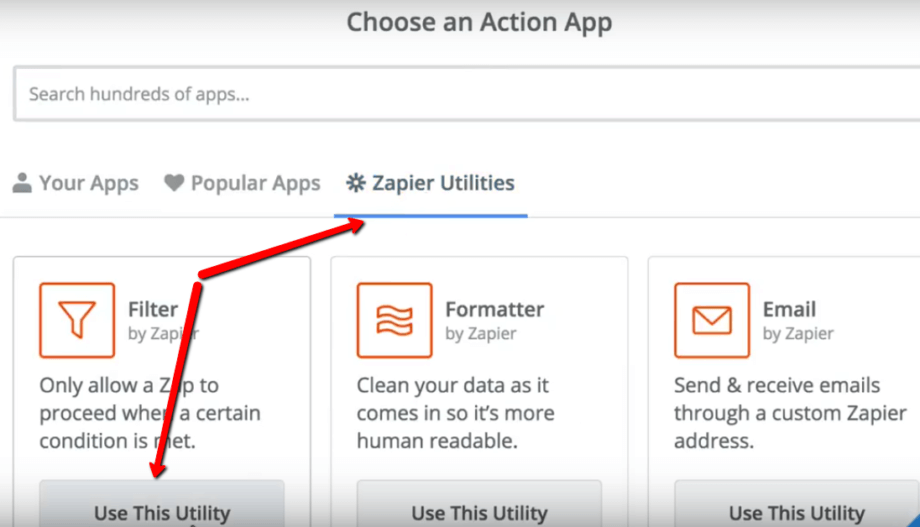
Step 7: Now, you need to create a Filter for that Zap because you want the Zap to only run when a certain product inside your PayKickstart Campaign is bought. So click on the Zapier Utilities and then on Filter as shown in the following image:
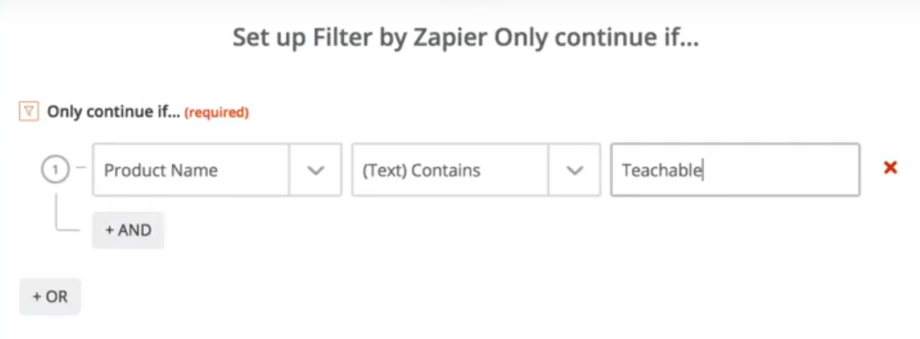
Step 8: Now, create a filter for the product as shown below and click on the Continue button. Please note that my product name in PayKickstart contains ‘Teachable’ text. So I’ve entered that text in the following image:
Step 9: Finally, you can create a new action to Enroll Users with Teachable. There are also other actions that you can do with Teachable. Check out this article for more info: https://zapier.com/help/teachable/#supported-actions
With Zapier, you can even delist or remove users who decide to cancel or refund their order through PayKickstart. Just create another Zap for that action by following the steps above, but selecting a different action.
It’s just another way that PayKickstart makes selling online and your business smoother, without all the headaches.
Simple. Easy. Growth.
How does PayKickstart stack up to the competition? See this Shopping Cart Comparison Chart.
If you’re not using PayKickstart to sell your products and handle all of the revenue sharing automatically, what are you waiting for? It’s free to get started today!
[cm_ad_changer campaign_id=”2″]
Matt Callen is co-founder of PayKickstart. He has founded several million dollar online businesses and lives in Indianapolis. Since 2006, he has helped hundreds of thousands of entrepreneurs scale and grow their online businesses with software and automation.
Read More About Matt Callen